Thursday, September 25, 2008

Thoughts for Thursday: Appreciation

“Appreciation can make a day, even change a life.
Your willingness to put it into words is all that is necessary.”

—Margaret Cousins

I made this card for a friend who has worked with me on a committee for church until just recently. I appreciate her willingness to help and all her hard work she put into activities for the ladies at church.

It's a simple card... I started with a pre-printed card base from Die Cuts With a View and added a strip of Dutch Blue CS from CTMH, printed paper strip from a past Designer Paper Pack from SU, punched out the circles with the Nestabilities Dies, stamped the image from Solo "T" from CTMH in StazOn Timber ink, colored in the image with various markers, and wrapped a piece of twill ribbon from Paper Trey Ink around the card.

This is a super easy way to "semi home make" a card in just about 8 minutes or so. I love the DCWV pre-printed base cards.

Inky Smiles!

Tuesday, September 23, 2008

Brayer Bliss


This weekend (before the head cold/flu bug from you-know-where set in) I did a little crafting and worked on the whole "brayer issue" again.

Here's my second attempt at a card done with the brayer and sponging. I used all CTMH ink colors and played with them on scratch paper until I got the color I wanted. The blues are Indian Corn Blue, Crystal Blue, and Heavenly Blue. The greens are Sweet Leaf, Olive Green, and Garden Green. The leaves are Autumn Terracotta tipped with Goldrush.

I followed Michelle Zindorf's post and created this card but made the following changes:

I tried using markers to color the leaves and the trees and have decided that I absolutely despise CTMH markers. My browns (the new style markers) have all gone a weird greenish brown color and they cause the clear embossing powder to clump up and look blotchy. Instead, I stamped the image in Versamark, then Chocolate ink, then used my pinky finger to tap off the Choc ink on the leaves, careful to leave the Versamark so the embossing powder would stay put, and then used the corner of my Honey inkpad to tap some color onto the leaves.

I decided that I didn't like mine cut out in a circle, so I played around with my rectangle Nestabilities. The little tiny framed art looked lost on the card, so I pulled the cut out excess from the garbage bin and layered the framed part up on the "background". I like how the "wind" stamp continues off the framed part to the background. I sponged the background edges to add more depth and pulled an American Crafts satin ribbon around the card and mounted it on a kraft cardstock from Archivers.

A tip: I did notice that after I brayered ink over the embossed images that they looked kinda blah, so I used a paper towel to carefully blot and pick up the color.

Monday, September 22, 2008

A Laugh for Monday

I'm sure many of you have seen these, but I'm sick as a dog this morning (cold/flu bug thing) and am too tired to create, but I needed a laugh. Found them on YouTube.. :) Enjoy

Thursday, September 18, 2008

Master the Brayer, Sensei.... or something.

*Bray-Urh* - "A brayer is a small hand roller, typically used in printmaking techniques to spread ink. They can be made of rubber, sponge, or acrylic and come in a variety of hardnesses for different applications." ~ From Wikipedia.org

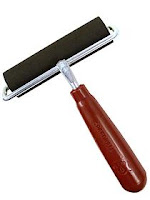
Wicked little rolly thing that has had me freaked out about using it for ages. Not sure why I was afraid to just use the dang thing... it's basically the same thing as a paint roller, and Heaven knows, I sure have used those enough! It might be my dislike for messy, wet, goopy art projects.... lol! Whatever the reason my little red rubbery brayer has been sitting in my craft bins since I bought it way back in, uhm, well.... March. I saw some neat stuff in the Technique Junkies Newsletter and wanted to try them, but then never got around to doing it.

So last night I was chit-chatting with Jeanne on Gtalk (super program for you Gmail users) and we were talking bout something or other and somehow brayering came up and Jeanne pointed me to Michelle Zindorf's SCS blog.... oh my.... pass out. Brayer lover heaven. Brayer fearer help! YAY! I basically read through some of her posts and sat down and decided to play... YAYHOO!


Materials Used:

Erin's Creative Color Challenge
CTMH New Fallen Snow Stamps & Acrylic Blocks
CTMH Garden Green, Clear & White Embossing Powders
CTMH Chocolate, Crystal Blue, and Sweet Leaf Inks
CTMH Pewter brads
Somebody's generic white and chocolatey colored cardstocks
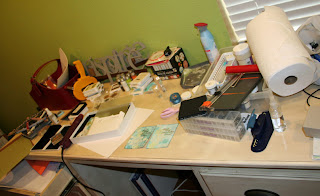
A heat gun and a brayer

Here are the first two prototypes... not exactly what I wanted, but they turned out pretty cool. Kinda like Batik.... remember when we rolled up our tshirts and tied them up with rubber bands and dyed them in high school so we could be cool? Ok, some of you may not remember that... but us 80's kids... well... anyway.

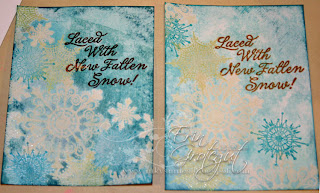
I basically just did the embossing powder resist technique. I random stamped and embossed the snowflakes until I had what I wanted for a design. Then I inked up my brayer and rolled it over the card. The ink didn't quite make it into all the tiny details of the snowflakes, so I sponged the ink into the details. I had a blast trying out something different and new, even if it was wet and messy, lol!


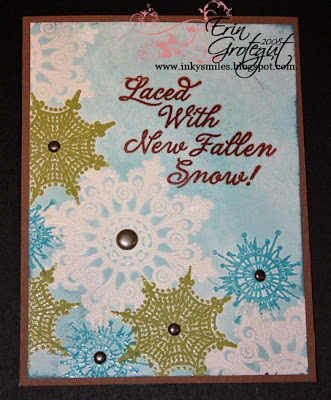
I finally achieved (sorta) what I wanted for the resist and richness in color for the snowflakes.... but something was missing, and I didn't want to fuss up the card with gobs of ribbon or anything, so I stamped a sentiment in chocolate ink and then marched back to the guest room to fetch some metal embellishments... pewter brads stuck in the middle of the snowflakes did the trick! I kept trying to tuck the sentiment in amongst the snowflakes, but the ink did not want to stick to the embossed snowflakes... perhaps next time I will try using StazOn for the sentiment.

I can't wait to see your take on the color challenge! Push yourself to try something new, new colors, a new product, or a new technique :)

Wednesday, September 17, 2008

Thoughts for Thursday: Color Inspiration and a Challenge

Today's Thought for Thursday is about color. I know I did a color thought a while back, but while I was perusing the paint chip aisle for the right (tan/gold/green/steely blue something or other paint for the bathroom) at Lowe's the other day my eye caught a cool looking brochure from Olympia Paint. (Dig the red wall on the cover!) I opened it up and started reading it and found these cool thoughts on color and inspiration.... (Italics added by me.)

"A soothing green. A commanding red. Color has no boundaries. No set rules. (But some good general guidelines.) It’s all about your own personal taste and inspirations. Just imagine the possibilities. A blue that captures the sunlight dancing on the sea. The deep yellow of a sunflower that makes you smile. Your choice of color sets the tone and begins the journey of creating a home project that speaks to you and about you.

Inspiration is all around you. Inspiration can come from so many different places. The world we live in. The objects that surround us. Everywhere we look, our world is filled with a palette of colors; from the warm, inviting shade of a room in candlelight, to the vivid tones of ripening fruit, to the cool colors of the seashore. Colors catch our eye. They spark ideas. They reflect moods. As you look at the colors of your world, choose those that help to create your own personal statement.

So what inspires you?"


This is my newest color inspiration..... the colors make me feel alive and vibrant without being too "yaha"...

It came in the mail today, yahoo! (please ignore the fact that my pants are too big, yay, and I have no makeup on... lol!) I love the color combination... translated to CTMH colors I think it would be: Twilight-ish, Colonial White, Sweet Leaf and Cocoa/Chocolate combo. Not quite sure what it translates into for SU!

So .... LONG WINDED thought today... BUT here's your challenge: Use this color combo and make a card or a layout and post a link to your art here in the comments section. I'd love to see what you come up with! I dug out some stuff tonight and I am off to try out my new paper piercing mat pack kit thingy and slot punch from SU! I've got a calendar page to do for a swap I signed up for and a couple other ideas rolling around in this noggin..... WAHOO!

Edited 11:20 PM 9/17/08: I'm in the studio playing with my craft stuff (nevermind that I'm working out of Rubbermaid totes and walking back and forth between the guest room and family room and laundry room where other things are stored - haha) and I think I'm coming up with something fun to share on Friday! I was talking to Jeanne about a "relatively simple" technique that I've never tried and we challenged ourselves to try it out this week...

Saturday, September 13, 2008

TILE & An Update

I have been asked a zillion times "When are you going to be done with your studio so we can see it?" I am so stoked for my new space, but it's so crazy here, I really am not sure.... I will post updates along the way and when it's ready I might just have to do a really cool giveaway from Stamper Storage :) Here is the update I posted on a Yahoo Group....
"I'm SLOWLY working on the new studio.... Our Great Flood repair has turned into something of a small remodel of the house.... We figured that since we were all torn up (and we have insurance money to streeeeeetch with our elbow grease) we might as well keep tearing things up and make the changes that we've been wanting to make for a long time now. We're currently in the middle of remodeling my master bathroom (new tub, new wall tile surround, new floor tile, faucets, mirror, etc) and are waiting for the floor trim (transition pieces) to come in off backorder. They've been on back order for a month now.. ugh! Once the trim pieces come in we can start and finish installing the hardwood on the main level (we're ripping out all the carpet on the first floor). YAY!

I also have to wait for Brent to finish house stuff before he can build the new pieces of furniture for my studio. Part of my birthday present (pre flood) was a new piece of furniture/storage whatever for my studio. I've drawn up what I'd like him to build and once we get the bathroom done, he MIGHT be able to start it.. lol! Oh, and then there is the fact that I no longer have an InkStak.. lol... I sold mine. :) We're going to custom build a big huge monster one for above my workstation.... oh I have fun plans for the studio...

The studio is now painted a beautiful green (I think it's Artichoke or Asparagus by Behr... B picked it out) and the trim is in and most of the floor is in and the big honkin desk is set up and I'm slowly getting reorganized. Hope to have some time this week to construct curtains for my window and


All of this craziness is happening right along with Brent working full time, me working part time and taking care of the house, AND both of us building InkStaks along the way. OH wait, and it's harvest season, so I've been doing some canning and tending my garden. It's absolute chaos here at our house... lol! (I don't know how people do major remodels with children!!! It's hard enough on a small one with two adults and a dog!) I still have three closets and two bedrooms on the main level to sort out and dejunk before we install the floors, too. It's amazing how much extra stuff two people can accumulate after living 7 years in one place. Hehe!"

Here is what the studio looks like this morning... (photo take sitting in my closet... lol).... supplies stashed away in buckets and bins awaiting their new homes.... More bins and a bookshelf still hiding around the corner.. ugh!

SO ANYWAY..... today we are making some major progress:

Today is TILE day in the bathroom. Brent just finished cutting and installing the concrete backerboard and is now preparing the mud (mastick, tile glue goop) to slather on the walls. WAHOO!

Last weekend we went to Lowe's and spent over 2 hours wandering the tile section and bathroom faucets section..... We finally decided on tile (made a major change from what we originally planned) and I finally made up my mind on faucets...


We have had a couple of patterns for the tub surround laid out on our living room floor for the past week trying to decide on the pattern.... Here are the two we narrowed it down to:


We decided to go with #1. (They are the same color tiles, just crappy lighting...) It has the "subway/brick" pattern on the bottom in 6" squares and then the same pattern in the trim to separate the 6" tiles on the diagonal. We thought that it added more visual interest and looks less "industrial" (aka blah).


Now we just have to decide on a wall paint color... I am stuck. I don't want the walls to look anemic by painting a tan that totally blends into the tile and I don't want some "yaha" color on the walls, either. I made a shower curtain to fit the space and I don't want to have to purchase a new one.... the curtain is a dark red with flowers all over it. It's got rich golds and creams and greens and a hint of steely blue in the flowers... perhaps I should take I took a pic of it and you all can give me some expert advice!

Here are some pics... what do you think?


Brent is hollering that he needs my opinion so I better get going.....

Wednesday, September 10, 2008

A Little Art: Scrunched and Distressed Leaves


I have decided that I absolutely LOVE altering letters! Here's a fun little project that I made to hang on the walls of my new studio....

I bought the paper so long ago and created this rather quickly and tossed out the little edge that says who makes it.... so I apologize for not being able to tell you right off who made it.

{Click on photos for larger views}


The E is a hardboard letter that I picked up at Robert's Crafts. The rhinestones are from Me&My Big Ideas (MAMBI), the ribbon is Papertrey Ink. I clipped the flower from a 99c bushel of flowers from WalMart. The leaves are created using a scrunch and distress technique.


Scrunched and Distressed "Leaves"

Materials:
Scissors
Inks for distressing
Cardstock (I used a textured one from Archivers on my original E & I liked the effect.)
* Baby Wipes (optional)

1.) Cut out your leaves... make random looking shapes.
2.) Make a center "crease" for the center vein of the leaf and ink up.
3.) Use all of your pent up frustrations and scrunch up the paper leaf.

Seriously, scrunch it up like you're smashing it into oblivion... you want all sorts of funky creases.

4.) Open up your leaf and begin smooshing it all over your ink pad to start adding life to the veins. Warning: your fingers will get extremely messy. Baby wipes come in handy at this point. (Scrolling on up to add Baby Wipes to the materials list.)

5.) Scrunch up your leaf again and ink up. Repeat until you get the desired effect.
6.) Open up your leaf again and add some final touches... add additional ink colors for more fun effects! Experiment and have fun with your leaf!


This is a fun technique to use for making fall leaves for cards, scrapbook pages, etc. Here are some oldies from my CTMH days...


There's A Dog In My Shower

Every now and again you are blessed with an adventure to remember that, thankfully, no one is around to snap photos of for you to scrapbook.

On Monday, I was getting ready for the day, taking my shower, usually a relatively uneventful task... lol... just wash up and get out and on with the day. Well, on Monday, my master bathroom looked like this:

That meant we had to move into the main bathroom for a little while. The main bathroom is just off my hallway and while it does have a nice little ceiling fan, it doesn't have a window for venting purposes, and I always hate having the whole bathroom steamed up while I'm trying to get dry and dressed, so this time I left the hall door open... It's just me, Brent, and Sadie, so I have no intruders to worry about because usually she's doing this:


Don't mind the unmade bed, the faucet and such piled up while Brent harvests parts needed to test the tub, and Brent's day job clothes thrown on the bed because he couldn't be bothered to throw them in the laundry basket before changing into his construction man work clothes... lol..... {I say that with love in my heart :) }

Anyway... I am about to rinse the shampoo out of my hair when suddenly my ears are ringing with the sound of EVERY SINGLE smoke detector in my house going off at the same time. And then immediately I hear the rustle of the shower curtain and look down to see this big ball of brown and white fur tumble into the tub and then two little yellowy/amber eyes looking up at me, meanwhile the shower water and shampoo from my hair are splashing down on one trembling puppy. (She has issues with the chirping of the smoke detectors... I believe it hurts her ears and scares the bajeebers outta her.)

There's a dog in my shower.... So as quickly as I can, I rinse the shampoo out, grab a towel, and hurry and get out of the tub, followed by a dripping wet, still trembling doggy. I call Brent immediately because I am not sure what to do ... the smoke detectors are all wired to the house electrical system, so I can't just yank one off the wall to turn them off. He's on the other end of the phone laughing his safely covered, dry rear end off while I'm in a state of soggy confusion trying to figure out what to do. I finally gather my wits and grab my dust mop from the kitchen and use it to push the "test" button on the smoke detector... It works for a second and then they all go off again. For the next 5 minutes (after having shut the bathroom door to prevent more steam from escaping and further tormenting me and my sweet dog) I press the button until the detectors finally silence themselves.

I am so glad that there was nobody around to photograph that adventure! LOL!

Saturday, September 6, 2008

Back To School - A Gift Set

I have some really awesome friends.

I ordered some SU stuff from a party that my friend Susan Culotti had (on the east coast of the US) a little while ago. When the box arrived, I couldn't wait to rip it open and start playing with my loot. So I got the box opened and to my surprise Susan had included a little surprise...

A TREASURE BOX!

So I unsnapped the flap, and slid out the tray in the little box....

It was filled with miniature TREASURES! (I am a sucker for miniature things, not to mention the colors... FABULOUS and FUN and will look so cute in my new studio!)


I IMMEDIATELY emailed Susan to thank her and asked her where she found all these little treasures and here's what she said:
"I bought a bunch of the dewdrops (Halloween, Cowboy, Poinsettia, Flame, etc.), so I had plenty to share, ya know? Figured a "sampler" was the best way to go - if you trip over a favorite, let me know what color it is, and I'll tell you which jar it came out of! The tiny clipboard is from AC Moore in the unfinished wood dept (it had a chain, so I'm guessing they were thinking keychain or something - I took the chain off), I made the little Post It holder out of chopped-down coasters. The cupcake Post Its, the wooden cupcake, the pencil holder and the pencils are all finds from JoAnn. When I saw them, my "cute counter" (as opposed to "geiger") went off the charts, so I knew you needed them! I think that's it! "

THANK YOU SUSAN! :)

So here's my challenge to you all.... over the next week, think of someone who needs a little cheer in their life and do something special. Send a card, bake some cupcakes, tend a couple of kids, wash a floor, give a hug.... make someone's day.

Inky Smiles!

Wednesday, September 3, 2008

Crush

I haven't really listened to the radio in ages... (I am so behind on "new popular music".. lol) I've been using my drive time to work as "think time" instead of drowning out the world with the radio, but yesterday at work I flipped on my radio and this song was on and I couldn't get it out of my head all day and most of last evening, so I did a little search on YouTube....

Beautiful voice, beautiful lyrics... reminds me of when I first starting dating my sweetheart over nine years ago... "all I ever think about is you"... sigh.... and I still have a *crush* on him.

Take a listen...

** If you want to purchase a legal copy of the song, which I just did, (and tote around in your ipod with ya) click on the "Purchase CRUSH here" widget on the right hand side of the blog.

Tuesday, September 2, 2008

Where The Rubber Hits The ... errr.... Acrylic Block! A Tutorial

Better late than never.... I DID tell you I was working on a tutorial last week... :)

As I type this, I am relishing in the sound of plaster being sawed off the walls and am giddy with excitement to hear the sound of the saw riiiiiiiiiiippppppppppppppppping through the nasty acrylic bathtub and surround that currently makes up my master bath "oasis". Hehe! We are waiting for the floor trip and stair bullnose to show up so that we can continue on with the woodfloor install. With any luck it should be here the first of next week and then the BIG mess begins. Once all the floors are in I can start REALLY sorting out my stuff and rebuilding my space. (Plus, B will might have time to build my new piece o' furniture for the studio.... eventually.. lol!)

*Deep Breath*

For the longest time I simply could not get off the "clear acrylic stamps only" wagon... I LOVE clear acrylic stamps! I love being able to see exactly where I stamp on my artwork and not have to get a "crick" in my neck laying my head down on the desk trying to line up a stamp.

I have found some marvelous stamped images that are manufactured in red rubber and have been "hohumming" about buying them because I really just don't like using wooden blocks and/or not being able to "see" where I am stamping... SO.... I peeked around on the web and saw this idea and decided to try it out.

I have seen the light! My eyes have been opened to a whole new RED {& grey} world !!! It works for me, so I thought I'd share it with you. I snapped these photos AGES ago, right before "The Great Flood", which explains the InkStak in the background. :) So without further rambling....


Where The Rubber Hits The .... errr..... Acrylic Block!


You will need:
* A sheet of uncut rubber images
* Sharp pair of scissors
* EZ Mount foam stuff
* StazOn ink {& cleaner}
* Scrap paper

The rubber stamps that I am showing in this tutorial are from Missy B Designs. Missy is the daughter of a friend of mine and has some way cute {and way *snort* cheeky} designs. *All stamp images in this tutorial are Copyright Missy B Designs.


Step 1:
First things first, this red rubber stuff comes in a sheet that is flimsy and floppy {and a bit stinky, too}... it helps to do a rough cut around the images for easier handling. Onward and upward....


The REAL Step 1:
Once you have a manageable piece of rubber stamp to work with, cut a little closer to the images and trim them up how you like your stamps. I try to trim mine with nice sharp solid edges as close to the image as possible so that I have limited "oops" stamping areas on the rubber. Toss out the scraps.


Step 2:
There is a {really, extremely, horribly) sticky side of the EZ Mount Foam stuff and there is a "static" side. For this step, you need to determine which side is the sticky side.

(DO NOT PEEL OFF THE PROTECTIVE PAPER YET (please, cuz you will regret it, I promise... see it totally pulling at my skin? It's not worth the hassle, leave the paper on... ok... moving on.. hehe...)


Step 4:

Place your stamp image with the IMAGE side facing UP and the flat side (back) facing DOWN on the EZ Mount Foam and trace it out with a Sharpie marker.

Step 5:
Cut the image out of the EZ Mount Foam with sharp scissors. You will most likely need to clean them with an anti gunk cleaner. It's some nasty sticky stuff!


Steps 6, 7, & 8:


Peel the paper off of the STATIC side of the EZ Mount Foam and lay STATIC side UP on the workspace.


Ink up the stamp with black StazOn ink, careful not to get ink on the edges {or your fingers - Black Finger Club here we come....}


GENTLY press the image onto the STATIC side of the EZ Mount Foam. Place it on the EZ Mount EXACTLY to fit how it was cut out. Let the ink dry for a few minutes or you will end up a member of the Black Finger Club.


Step 9:
Remove the paper from the sticky side and adhere the rubber stamp, image side UP. See pics below. You should be able to see images on both sides of the stamp.


That's it! Now you have an image that you will be able to see AND line up through the clear acrylic block. If you're careful about making sure all your edges match you will be able to get a nice lined up image even without being able to see through to the paper.

This what you will end up with. You can see in the first photo why I know about the Black Finger Club...


EDITED: if it's not a square stamp (above far right picture), cut out as close to the image as possible using nice straight lines and just sort of cut around the image. It helps to match up the image to the EZ Mount if you cut in a way that it can only match up one way. (See the crown?)

Also, I have not noticed that the ink inhibits clinging to the block.