Wednesday, March 14, 2012

Black Magic – A Folksy, Doodly Focal Image Technique

Today I have a fun, folksy, doodly focal point image technique to share with you called Black Magic.  I saw this technique at SCS and fell in love with it and decided I just had to teach it at Creative University. It’s easy, fun, and different! I love the folksy look of the white doodles.  They remind me of tole painting and folk art.

IMG_7247WEB

Here’s how you do it.


I’ve been having fun with these quickie video tutorials & have one more coming soon!  I think I want to do more.  Is there a technique you’d love to see me demonstrate? Let me know and I will do my best to put a tutorial together for you.

Inky Smiles!

Sunday, March 11, 2012

Faux Silk – A Luxurious Background Technique

As promised I have another fun artsy technique for you today.  This one is called Faux Silk. I really like the texture that this technique gives to a focal point. Simple, quick, and beautiful.

IMG_7242WEB

Here’s how you do it.

Monday, March 5, 2012

Bird on a Wire

Several weeks ago I share this sneak peek of the project I taught at Creative University in February.

IMG_7222WebSmall

Here’s another peek/close up:

IMG_7220WebSmall 
And here is the whole bracelet. I went with the whole “woodland” theme this year.  (Our charm swap was “Woodland Fairies”.) The focal point is a bird on a giant turquoise egg in a wire wrapped nest. 

IMG_7216WebCopy-Erin 
It was CRAZY prep work for this class... hundreds of beads & findings to sort and count, wire & chain to measure & cut and package up all neatly.  Thankfully I had the help of my wonderful husband to help sort and count beads.

IMG_7258web IMG_7265web IMG_7301web   IMG_7305web IMG_7310web
I had so much fun teaching this to my CU girls.  I had nearly 60 students, most of which were beginners.  I did step by step teaching and we worked our way through several different jewelry technique/skills (Wire wrapping, wire wrapped loops, bead stringing, crimping, metal stamping, etc) as we built this fun bracelet.  Everyone finished their bracelets in class and it was awesome seeing them on everyone’s wrists. :)  We even had door prizes!  Four lucky winners per class won a velour beading mat and jump ring opener. :)

IMG_7313web 
Here are some fun pics that Amy Kupperman snapped during class. (I was teaching and couldn’t really snap photos, so I had to hijack these from Amy’s fb album).

429806_2985739315770_1030643681_32428388_1684379627_n 420861_2985738155741_1030643681_32428383_758288524_n
431639_2985738555751_1030643681_32428384_1548368551_n
425597_2985740555801_1030643681_32428394_2089739342_n 
And some more photos hijacked from Linda Schwartzenburg’s fb album:

419009_2666138493639_1261339624_32133664_420818386_n
425233_2666137573616_1261339624_32133662_740649746_n

And some photos hijacked from Linda Wendeborn:

 LindaWbraceletpack  byLindaWendeborn 
421078_3455004337362_1338430328_3371858_506809452_n 
I had the most FABULOUS charm fairy teacher helpers, too.  They took the time to help each student/table on an individual basis as we went.  I could not have done it without them. Kim was one of my helpers.  Here she is with Joy from Everyday Cricut. (photo courtesy of Linda Schwartzenburg)

402521_2666139053653_1261339624_32133665_944036899_n

Here’s a pic of all the teachers from CU this year.  Left to Right” Michelle Johns (Altered Art), Sheila Bennett (Card Cafe), Tresa Black (Hostess), Michelle Nist (Scrapbooking) and me, Erin Grotegut (Jewelry).

teachers

Jazz Hands!

TeacherJazzHands 
Inky Smiles!

Wednesday, February 29, 2012

Oxy Magic – An Inky Background Technique

Hi friends!

Today I have a fun technique to share with you! This year at Creative University Tresa had the teachers put on a Technique Boutique.  Each of us contributed 4 technique make n take style tutorials for the boutique.  For my techniques I tried to do something “different” than what you’d see at a traditional “stamping demo party”.   I will be sharing alll 4 techniques via video over the next couple of weeks.  This is one of my favorites!  It’s called Oxy Magic/Foxy Oxy… etc…

IMG_7244WEB

Here’s how you do it!

Enjoy!

Sunday, February 26, 2012

Happy {almost} Spring & an InkBlok!

Hey friends!

Happy {almost} spring!  It sure feels like spring around my place. We’ve had beautiful sunny weather and I haven’t worn a coat or jacket in several days. I am back from Creative University and am working on editing photos to share with you, but first I want to let you know what else I’ve been working on behind the scenes…

A while ago I built some fun (non plain jane) ink and stain applicators with my dad in his workshop.  Several friends wanted some too, so now…. and finally, after months of prep work and a kink in the manufacturing process (we build these ourselves in our shop) …..

InkBloks are available at Stamper Storage & soon in my Etsy shoppe!

InkBlokRelease2-2012

Hop on over and check them out! 

Inky Smiles!

Tuesday, February 7, 2012

Creative University Project… Sneak Peek!!

I was asked to teach jewelry again at this year’s Creative University by Tresa Black and have been a very, very busy girl getting ready for it.  The teachers also have another project besides their class and we’ve been busy working on that project as well.  Needless to say between CU, Jr High 4H, and 8 yr old Activity Days Girls at church I haven’t had time to breathe or blog.  Oh, but I’ve wanted to and have some projects to share when I find time to edit the pics. Creative University is NEXT WEEK and I am busy packing and making sure I have all my class goodies ready!

Here’s a sneak peek of this year’s jewelry project:

IMG_7222WebSmall

And a blurb from my class description:

Bird on a Wire Bracelet

Get all wrapped up in earth tones and sparkly goodness creating this fabulous bracelet in Erin’s jewelry class. We will learn to string beads, use crimp beads, open and close jump rings, and join multiple strands for a bracelet. We will also learn how to wire wrap a focal point using art wire, stone beads, and metal embellishments. Finish it up with a peek into metal stamping on a final embellishment.”

C.U. SOOOOON!

Tuesday, December 13, 2011

A Copic Christmas

Good morning friends!

I have this friend who’s really super cool.  She teaches fabulous classes and has a spot on our local tv channel.  I try to make it to her classes whenever I can, it’s a fun night of crafting with the girls.   My friend is Sue Neal of My Eye Q.  One of the coolest things about Sue’s classes is that if you can’t make it to her local classes she will mail your kit to you!  Each kit comes with excellent instructions and her follow up emails contain extra goodies for creating more projects.

Here’s a pic of last week’s class.  SoooOoo much fun, and darling gift bags/boxes.

Digital Ad TN

When my mom was here last month we took Sue’s Copic Marker class and created some fabulous Christmas cards.  We learned shading and basic coloring.  I’m hooked on Copic coloring – guess I better start saving for a bigger set of Copic Markers!  I think I even got Mom hooked on coloring.  She ordered a set of markers, too. 

Here are the cards we made in class.  We used Penny Black stamps, stamped with Memento Tuxedo Black ink.  (It’s the best ink for coloring with Copics.)

IMG_6868web

IMG_6864WEB

 IMG_6869web 

IMG_6877web

This card is my absolute favorite.  I bought the stamp to make more cards for next year, or maybe this year if I get around to it! I love religious themed cards.  Afterall, it IS the reason for the season.

IMG_6873web

IMG_6876web

Hope you’re getting all caught up with your Christmas preparations!  Get our your markers and make some cards!

Inky Smiles!


PS.. I also figured out a new photo lighting prop, thanks to Michelle Johns.  I love it! I love how the photos turn out with the reflection and muted background. 

IMG_6865web

Rather than try to tell you how, here is the link to the instructions:

Homemade Photo Lighting Prop

Monday, December 5, 2011

Adventures In Gingerbread Land

Wow, so for the last three weeks I have been off the radar again.  (We had my parents here for two full weeks over Thanksgiving and I was pretty much banned from the computer except for business schtuff.)

So anyway, at the beginning of Nov we had our date night group get together.  Each time we get together we choose some sort of theme for the activity.  This month Angie & Aaron were in charge and they chose “Traditions”.  Angie’s family had a tradition of building gingerbread houses every year so that’s what we did!

Angie and Aaron built the houses for each couple out of real gingerbread with candy stained glass windows, a front yard tree, and a light attached to the base.  They did an awesome job! 

We had a very quick and casual soup and scone dinner before decorating our houses. We wanted to get on to decorating Here’s a shot of our little group. (L-R: Aaron, Brent, Angie, Kaisa, Kelly, Jeremy & Kristin)

IMG_6542web 

This photo shows all the sides of the houses.

GingyCollageWeb

I brought my Kitchen Aid mixer up, which is a good thing because Angie’s mixer died right before we all arrived.  We made TONS & TONS of royal icing and marshmallow icing.
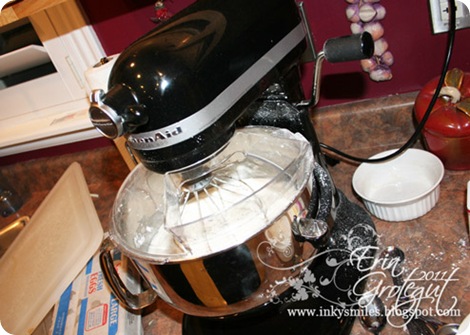
IMG_6557web

IMG_6559web

And had TONS & TONS of candy on hand.

IMG_6568WEB

Once all the icings were made we went to town decorating.

IMG_6561web IMG_6582WEB IMG_6608web IMG_6609web

IMG_6596web IMG_6585web

Everyone’s houses turned out just amazing and fun! 

IMG_6619web IMG_6626web

IMG_6611web

IMG_6616web 

Here are some close ups of our little house…

IMG_6629web

IMG_6634web IMG_6632web

I piped our initials on the heart window…. I couldn’t resist!

IMG_6631web IMG_6630web IMG_6636web

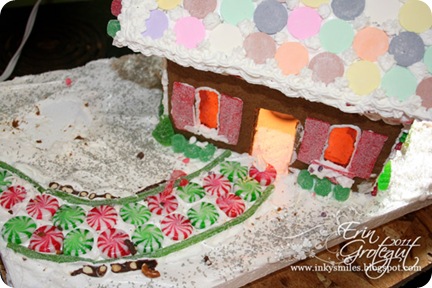
Our cute little house made it safely all the way home from Salt Lake City… It even looked so cute in our front room…. until we went shopping with Mom and Dad and left Sadie home alone with it.

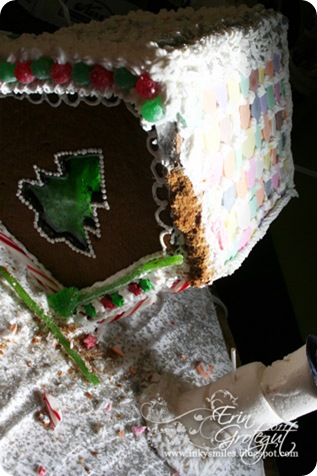
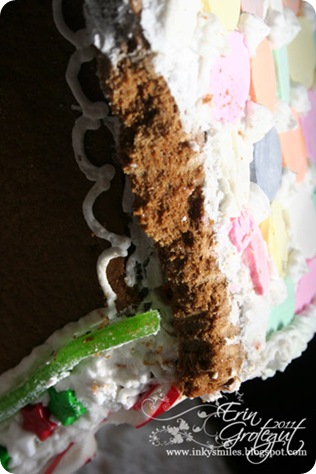
I think we walked in on Sadie when she was at this point:
 

IMG_6742web


IMG_6741web

Yes, that would be the roof.  She was moving on to her second course following the devouring of the front yard and tree.  The little twerp even gobbled up a window box. She ate the entire tree, too.  I guess hot glue does pass, too.

IMG_6737web

IMG_6738web IMG_6740web IMG_6739web

We’ll build again next year.  But next time we’ll put the house up higher and out of Sadie’s reach.  So, if you build a gingy house this year, have fun with it and put high out of reach of little paws… both the furry and non furry kinds.

Inky Smiles!